

Creamline: Weekend Brunch Edition
Creamline: Weekend Brunch Edition
Brow Business and Summer Pasta
Happy weekend, friends! We’ve been a little quiet over here, but we wanted to pop in and say hello over your Saturday morning latte or brunch cocktail of choice. Taylore’s a French 75 lady, but loves a good old fashioned mimosa. Christine is a Mezcal Bloody Maria gal, but has never had a bellini and likes the idea of trying one, especially where we’re in peach season.
For the next few weeks, we at team Creamline are taking a Euro-style summer break, then will be back in your inboxes after some rest and ~content creation~.
And now, our feature presentation!
Taylore: You asked, and now, I’m finally answering: I’m dropping the brow routine. It’s the question I get most often in Creamline’s DMs, and I genuinely just hadn’t had time to put all my recs in one place before now. That said, I owe all your sweet compliments to Maribeth Madron, the pro has been tweezing my arches hair by hair, once a month, for years. I met her during Fashion Week as a little baby Maybelline intern, and I’ve been loyal ever since. But these brows have come a long way! I spent the early aughts waxing away most of my precious arches, mostly because unibrows weren’t cool yet, especially for an eleven-year-old. Pre-teen girls are fucking MEAN, man.
My brow routine is actually more low maintenance than it would appear. On days I’m sticking with no makeup or a natural look, I just use a clear gel. But here’s the secret: I backcomb them like an Alabama prom queen from 1982. First, I rake the gel from the tails to the inner corners by my nose to coat the underside of the hairs. Then, instead of raking them back the other way in one direction to keep them uniform, I brush them upwards towards my hairline, working from my nose to the tails, a few strokes at a time. That way, I’m keeping the volume I created by backcombing them, but I still add definition to each hair. Benefit Cosmetics’ 24-Hr Brow Setter is my all-time favorite clear gel: it adds a healthy gloss to the hairs that make them appear conditioned, and my brows don’t budge until I wash it off. But if I’m going for what I call a party brow—big, bold, and meant to be the center of attention makeup-wise—I’ll use a soft pencil to add a little definition at the base of my brows, then switch to a tinted gel (see below for my picks.)
I did happen to have an overnight event with Benefit this week, and I found a new product I’ll be adding to the arsenal. Jared Bailey, the brand’s Global Brow Expert and certified Brow King, showed me how to use it and I was kind of floored. That *stupendous* new drop is under wraps until the 8/16, so if you want to find out what it is, check back on our Instagram and I’ll do a tutorial.

My brow routine won’t work for everyone, though, because everyone’s brows are wildly different. If you feel like your arches aren’t at their best at the moment, I’ve got some ideas on how to tweak your routine to better suit them. But the first step for you is to decide what you already like about the brows you’ve got, and what exactly you want to achieve. Maybe you’ve already got a voluminous, bushy brow, but you have sparse spots throughout that you wish were less noticeable. Maybe you love your high arch, but wish you had MORE actual hairs to re-enforce that shape. And if you hate everything about them, that’s fine too! Just combine some of the methods below.
If you plucked them all out in the 90s, try… micro pens, pomades, or microblading.
Let me start by saying that skinny brows aren’t a bad thing. In many cases, a slimmer brow can compliment your bone structure if your face is heart shaped, more angular, or just plain small. But if you do want to make your brows appear larger or longer, the key here isn’t shading with one solid color, but to actually create the illusion of more hairs. Micropens, like this felt-tip option, can create super-thin strokes that mimic actual brow hairs, or you can apply a pomade in small, gentle strokes using an angled brush. A hot tip I’ve heard from a few makeup artists: Rather than holding the pen or the angled brush firmly down by the tip the way you would with an actual writing pencil, hold them higher up, almost towards the end of whatever you’re using. This will create a more natural stroke that won’t immediately read as fake pigment.
I can talk more about this on our Insta stories, but microblading is worth considering if you’re really sparse and find yourself spending a ton of time on your brows every single day. Technically, it’s a semi-permanent tattoo: your technician will use a tiny, knife-like tool to draw on ‘hairs’ with ink that lasts for about a year (after that, you’ll need touch-ups.) It can be really pricy—between $400 and $2,000—but I know people who swear it’s the best investment they’ve ever made.
If your brows are the color of Spencer Pratt’s flesh beard, try… tinted gels or semi-permanent tinting.
Tinted brow gels are a quick way to add pigment and create the illusion of more fullness, and there are a ton of amazing ones to choose from. My top three at the moment: Glossier, Merit, and Marc Jacobs. Semi-permanent tinting doesn’t require a ton of commitment, and you can buy tints online or get them done by a pro. If you are doing them at home, use less formula on the hairs by your nose. Your brows shouldn’t have the same level of pigment all the way through.
If you’ve got sparse spots, try… pencils and pomades.
Shading the skin underneath your brow hairs can conceal those random spots you’re a little bald, and it’ll make your arches appear fuller as a whole. I like to use a more classic pencil that creates soft shading rather than deeper pigment with finer lines. Gucci’s is one of my stand-bys to add some depth to a daytime brow. Tip: try not to overdo it on the inner corners of your brows near your nose. Those hairs naturally grow more spread apart, so adding more pigment where your brow arches and in the tails will make them look more natural.
If you’re Team More Bush, try… fiber gels, but with purpose.
I like to rock a more bold, brushed up look rather than slicking my hairs in the same direction—because the hairs by my nose are so long, trying to wrestle them down makes it look like I have two tiny comb overs sitting above my eyeballs. I typically avoid the kind of gels that are formulated with tiny fibers that stick to each hair and make them look fuller, because they take me into Eugene Levy territory and I simply don’t have the range. But if you’re on the sparser side and want to deepen the pigment of your brows and increase their bushy-ness in one shot, these thicker, more heavy-duty gels are the way to go. As I mentioned above, place more of the formula where your brows and taper off towards the tails. If you front load the fibers near your nose, it’s a dead giveaway. Hourglass has a nice one, and Covergirl has a great drugstore option (this one is hardcore, so apply a little at a time.)
Christine, over to you!
Christine: Hello, friends! I hope we’re all well. Have we been carpe-ing the summer? Pretending like the word “Delta” doesn’t immediately induce a fight or flight response? Glutting ourselves on the abundance of summer produce?
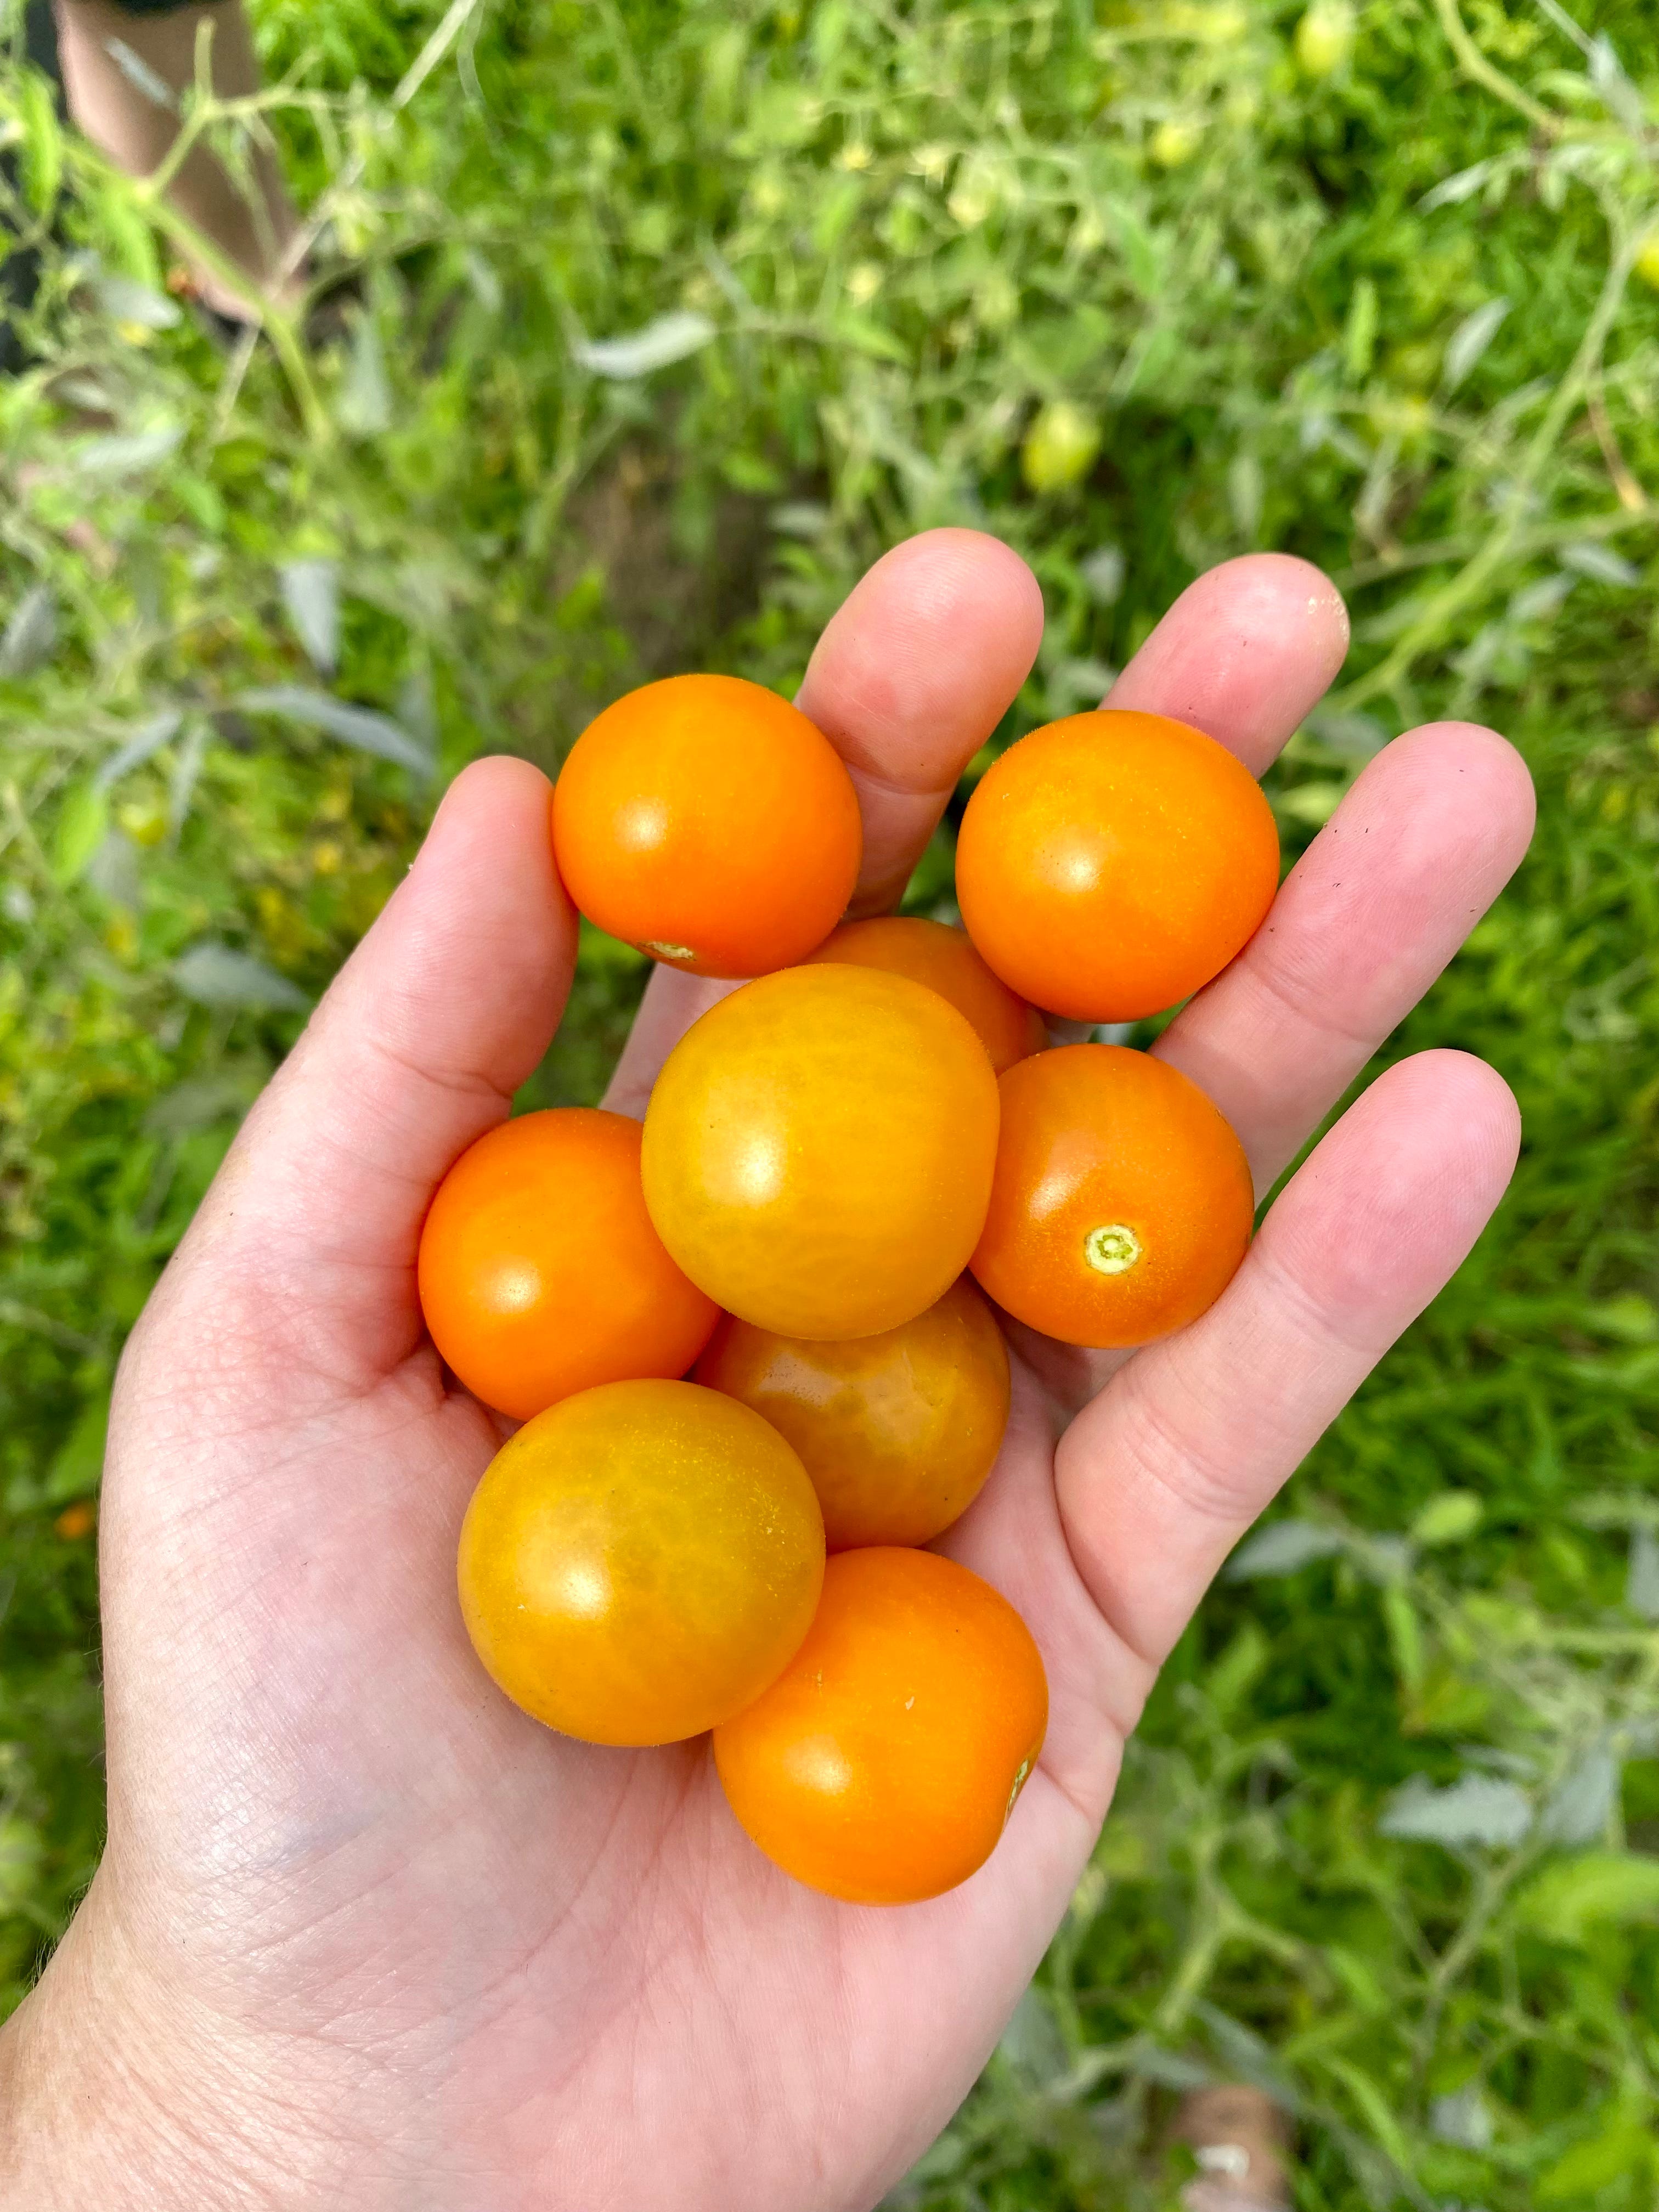
My garden has been BURSTING with tomatoes lately, each one a little gem of umami and sugar sourced straight from the sun. I’m infatuated with them, and along with smooshing them into my mouth by the handful, have been cooking with them nearly daily, slowly fine-tuning my summer recipes. It’s given me an excuse to eat a fuck ton of pasta, FOR SCIENCE.
I love the idea of fresh tomato sauces, but in practice, I often find them a little watery and underwhelming. I love the richness of cooked tomatoes, but then you lose some of the freshness of the perfectly ripe summer beauties.
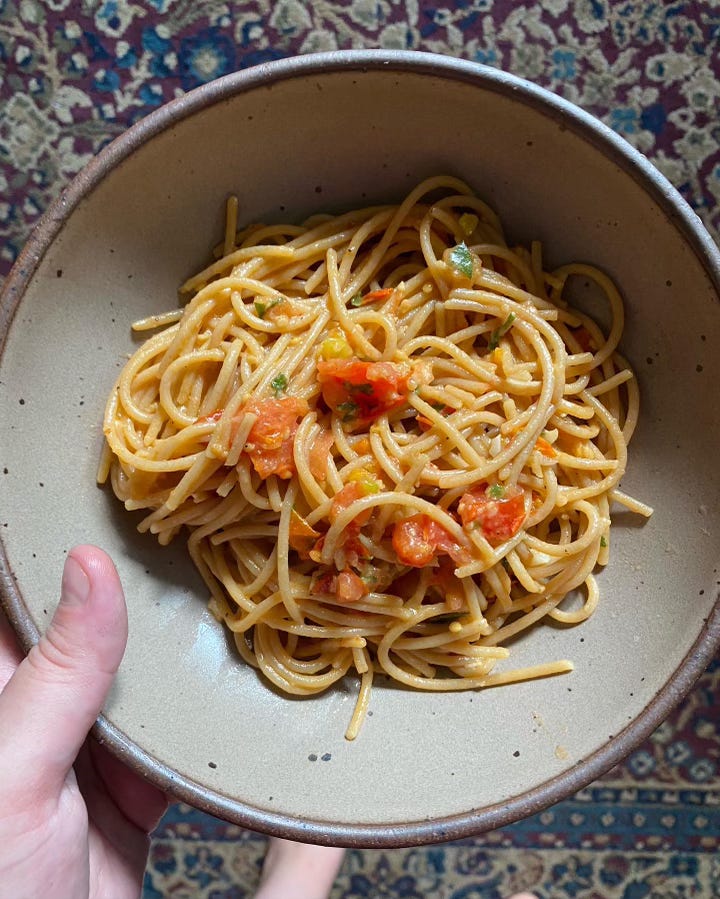
So, here’s the pasta situation that I made yesterday, which I highly recommend you make as well. It marries the richness of cooked tomato flavor with that “God, I love summer” burst of fresh tomatoes.
-Buy the most vibrant tomatoes you can find. Cherry, sauce, gigantic, whatever. Dice them up.
-Thinly slice a garlic clove. This is staying raw and spicy, so even if you’re a garlic fiend, you probably just want one clove per person.
-Throw in some herbs. I did fresh parsley and chives from the garden with some dried marjoram, but basil or a bit of oregano would obviously be lovely as well. If you enjoy heat, add red pepper flakes.
-Salt generously and leave covered on the kitchen counter for a few hours, allowing the tomatoes to release their liquid and the flavors to mesh.
When you’re ready to get going on the noodles (I did whole wheat spaghetti, but follow your heart here), strain the tomato juices out through a fine mesh sieve. Throw the liquid on the stove and let it reduce until about half the liquid is gone. This shouldn’t take long. In the meantime, glug your favorite finishing olive oil on your tomato mixture and get your noodles going. Once the noodles are juuuuust about cooked, drain them, but with about a cup of pasta water reserved. You almost certainly will not need it all, or even half of it, but better safe than sorry, ya know?
Then, toss the reduced tomato liquid, the fresh tomato mixture, and the pasta (plus a generous handful of grated parm because you only live once) in a hot pan over high heat, stirring constantly. You want the tomatoes to soften a tiny bit, but you’re not cooking them. Throw a splash of the pasta water in there if you want it a little saucier. Plate and finish with a little olive oil, freshly cracked black pepper, and enough parm that you’d be embarrassed to post a photo of the finished product to social media. I had a glass of Giulia Negri’s Langhe Nebbiolo with it, but a pilsner would also be lovely, albeit less traditional.
I am not ashamed to admit that I made this exact dish two nights in a row this week and may make it again today. My boyfriend, a better cook than I, proclaimed that “Nancy Silverton would kiss you on the mouth for this,” which is now the standard for which I will aim when I make pasta.
Wishing you all a very tomato-filled August, friends! We’ll see you in September.